
How to Reduce Image File Size

Introduction: Why Reducing Image File Size Matters?
If you own a website, you’d better reduce image file size every time you post an image.
Images are all over the web, and they are important to any website. However, many people don’t realize that images can be large in size and slow down the loading time of the page. This is where image optimization comes in. Image optimization is a process of reducing the size of an image to make it faster for visitors to load on a website.
The first step is to make sure that your images are optimized before uploading them onto your website. This can be done by using an online tool like TinyPNG, Affinity Photo, Affinity Designer, or Photoshop.
The second step is to reduce the size of your images for web by reducing their dimensions or file size (if you use Photoshop).
You can also decrease image size for web by decreasing their pixel dimensions (if you use Photoshop).
Finally, you want to make sure that your images are high quality by optimizing them for the web. It is important not to lose image resolution so that they stay sharp no matter what their sizes are.
Before vs After
Here is a comparison of the same image before and after size reduction. You can see the savings in file size.


Rule of Thumb
Every time you have an image that is 100KB in size or more, you should decrease the image size and optimize it for fast loading. Ideally, each of your images should be under 100KB in size. You should especially never use dense images that are 1 MB in size or more.
Top 5 Image-File-Saving Tools to Reduce Web Images’ Size Quickly
There are a lot of tools that help you reduce image file size quickly. In this article, we will introduce you to the top 5 tools to reduce image file size.
Image-File-Saving Tools:
1. TinyPNG – https://tinypng.com/
2. JPEGmini – https://jpegmini.com/
3. ImageOptimizer – http://www.imageoptimizer.net/Pages/Home.aspx
4. Compressor App (for Apple) – https://apps.apple.com/us/app/compressor/id424390742?mt=12
5. WordPress’s built-in image size optimizer tool.
How to Decrease Image Size in WordPress
There are millions of WordPress sites all over the world. And guess what? WordPress comes with a built-in image file size reduction tool that works just fine.
Here is a demonstration:
(1) In the editing mode (i.e., in the Dashboard), click and insert your cursor where you want the image to appear.
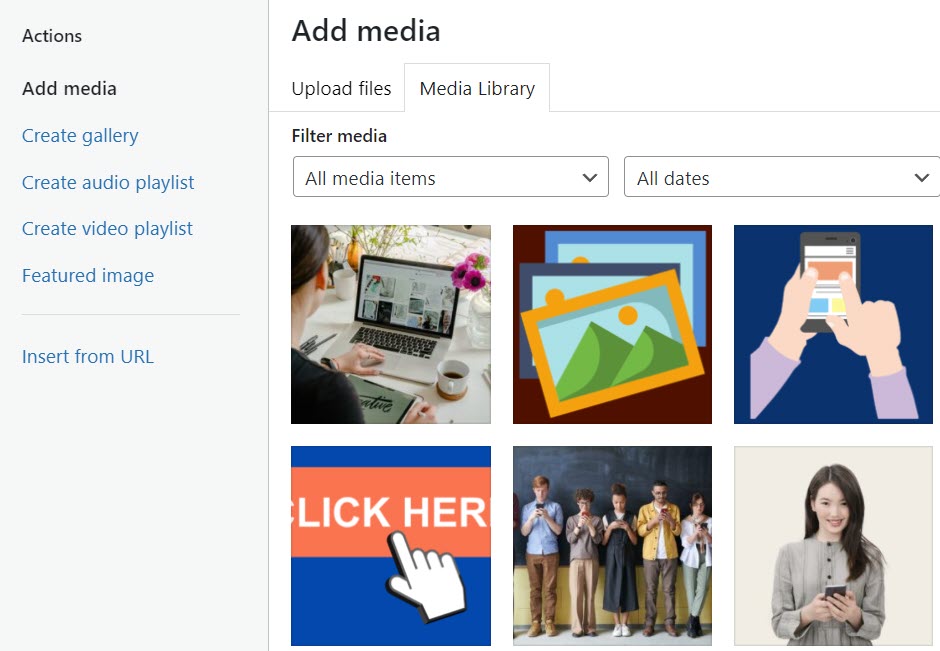
(2) Click Add Media button to display the WP Add Media screen:

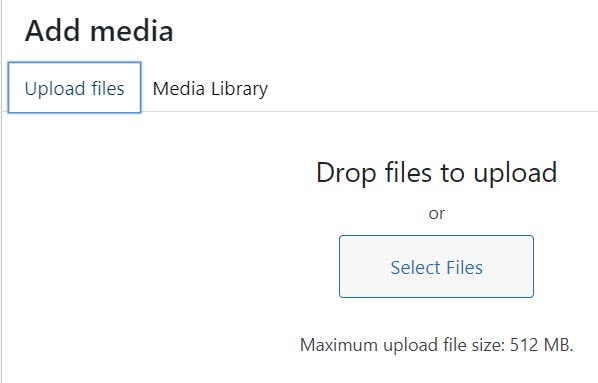
(3) Click the Upload Files link to display the Upload Files tab:
(4) Select or upload your file.
In this example, the file you’ve uploaded is 683 KB. Too big.
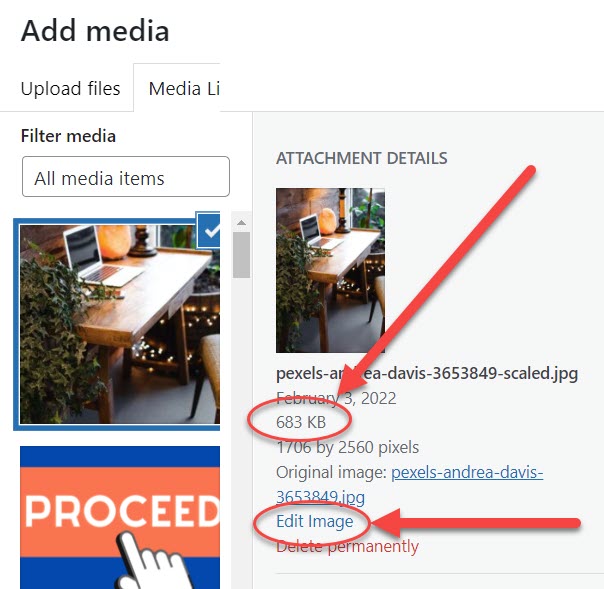
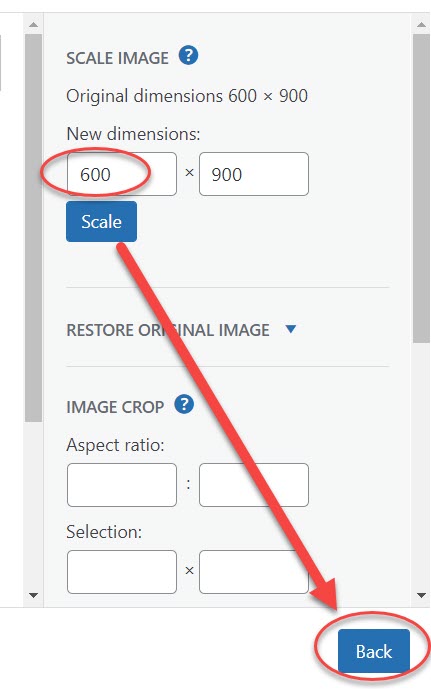
(5) Click the Edit Image link to display the Edit Image screen. As you can see, the image is 1706 px in width. We will reduce the file size by reducing the width of the image to 600 px.
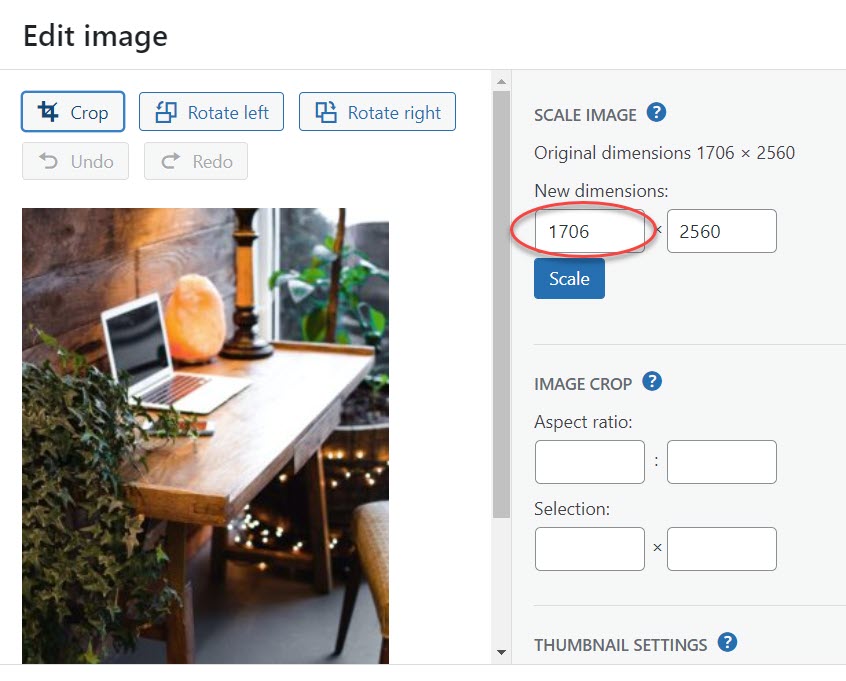
(6) Enter 600 px as the new width. Click Scale. And then click Back to go back to the Add Image screen.
(7) Now as you can see the same image is reduced to 97 KB. You’ve reduced the image file size by 586 KB!
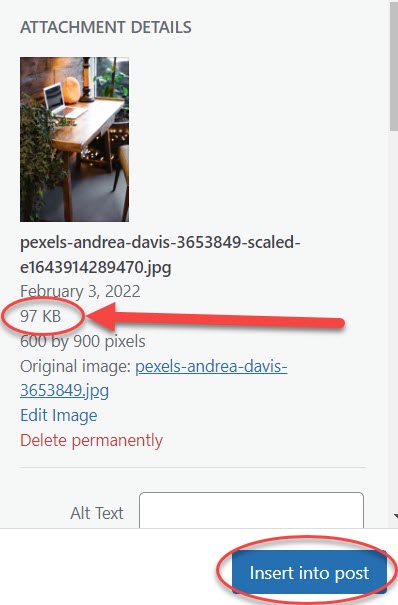
(8) Congratulations! Now you can click Insert into Post button and insert the image, with the confidence that now the readers will be able to download your image much faster, creating a much better UX User Experience.
Mission accomplished!
Conclusion
Images should always be compressed before uploading them onto a server. This is because image files tend to contain large amounts of data that aren’t necessary for displaying an image on a screen.
For example, if you have an image that is 2000×2000 pixels in size but only 300×300 pixels are showing, the software will create a copy of the image at the appropriate size, rotate it to fit the screen, and then crop it based on what is visible.
Images are a vital part of any website; they can be used to make your content more visually appealing, and they can also be used to help convey the message you are trying to get across. Images can be especially important in e-commerce websites, where product photos are crucial.
However, images can take up a lot of space on your website; this article presented methods about how to optimize them for the web.